Question:
I installed WP All Import - Import any XML or CSV File to WordPress on my server, aWP All Import - Import any XML or CSV File to WordPress' cron job script. What should I do to set up the cron job?
Answer:
As recommended by WP All Import officially at here, you may use EasyCron to trigger cron job script in WP All Import - Import any XML or CSV File to WordPress.
Our webcron service is best for triggering WP All Import - Import any XML or CSV File to WordPress' cron job script. Just follow below simple steps to configure cron job for your WP All Import - Import any XML or CSV File to WordPress:
- Open your cron job dashboard, click on " Cron Job" button.
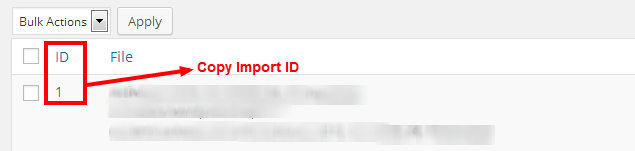
- Copy cron job Import Key (for later use) at:

Copy cron job Import Key - Copy cron job Import ID (for later use) at:
Copy cron job Import ID - In field "URL to call", enter the trigger URL: http://www.example.com/wp-cron.php?import_key=xxxxxx&import_id=1&action=trigger (replace www.example.com with your install location; import_key with Secret Key above; and import_id with Import ID above). Choose an appropriate cron job execution frequency (for WP All Import - Import any XML or CSV File to WordPress, we recommend to have the cron job run "every day"). Checkout below screenshot:
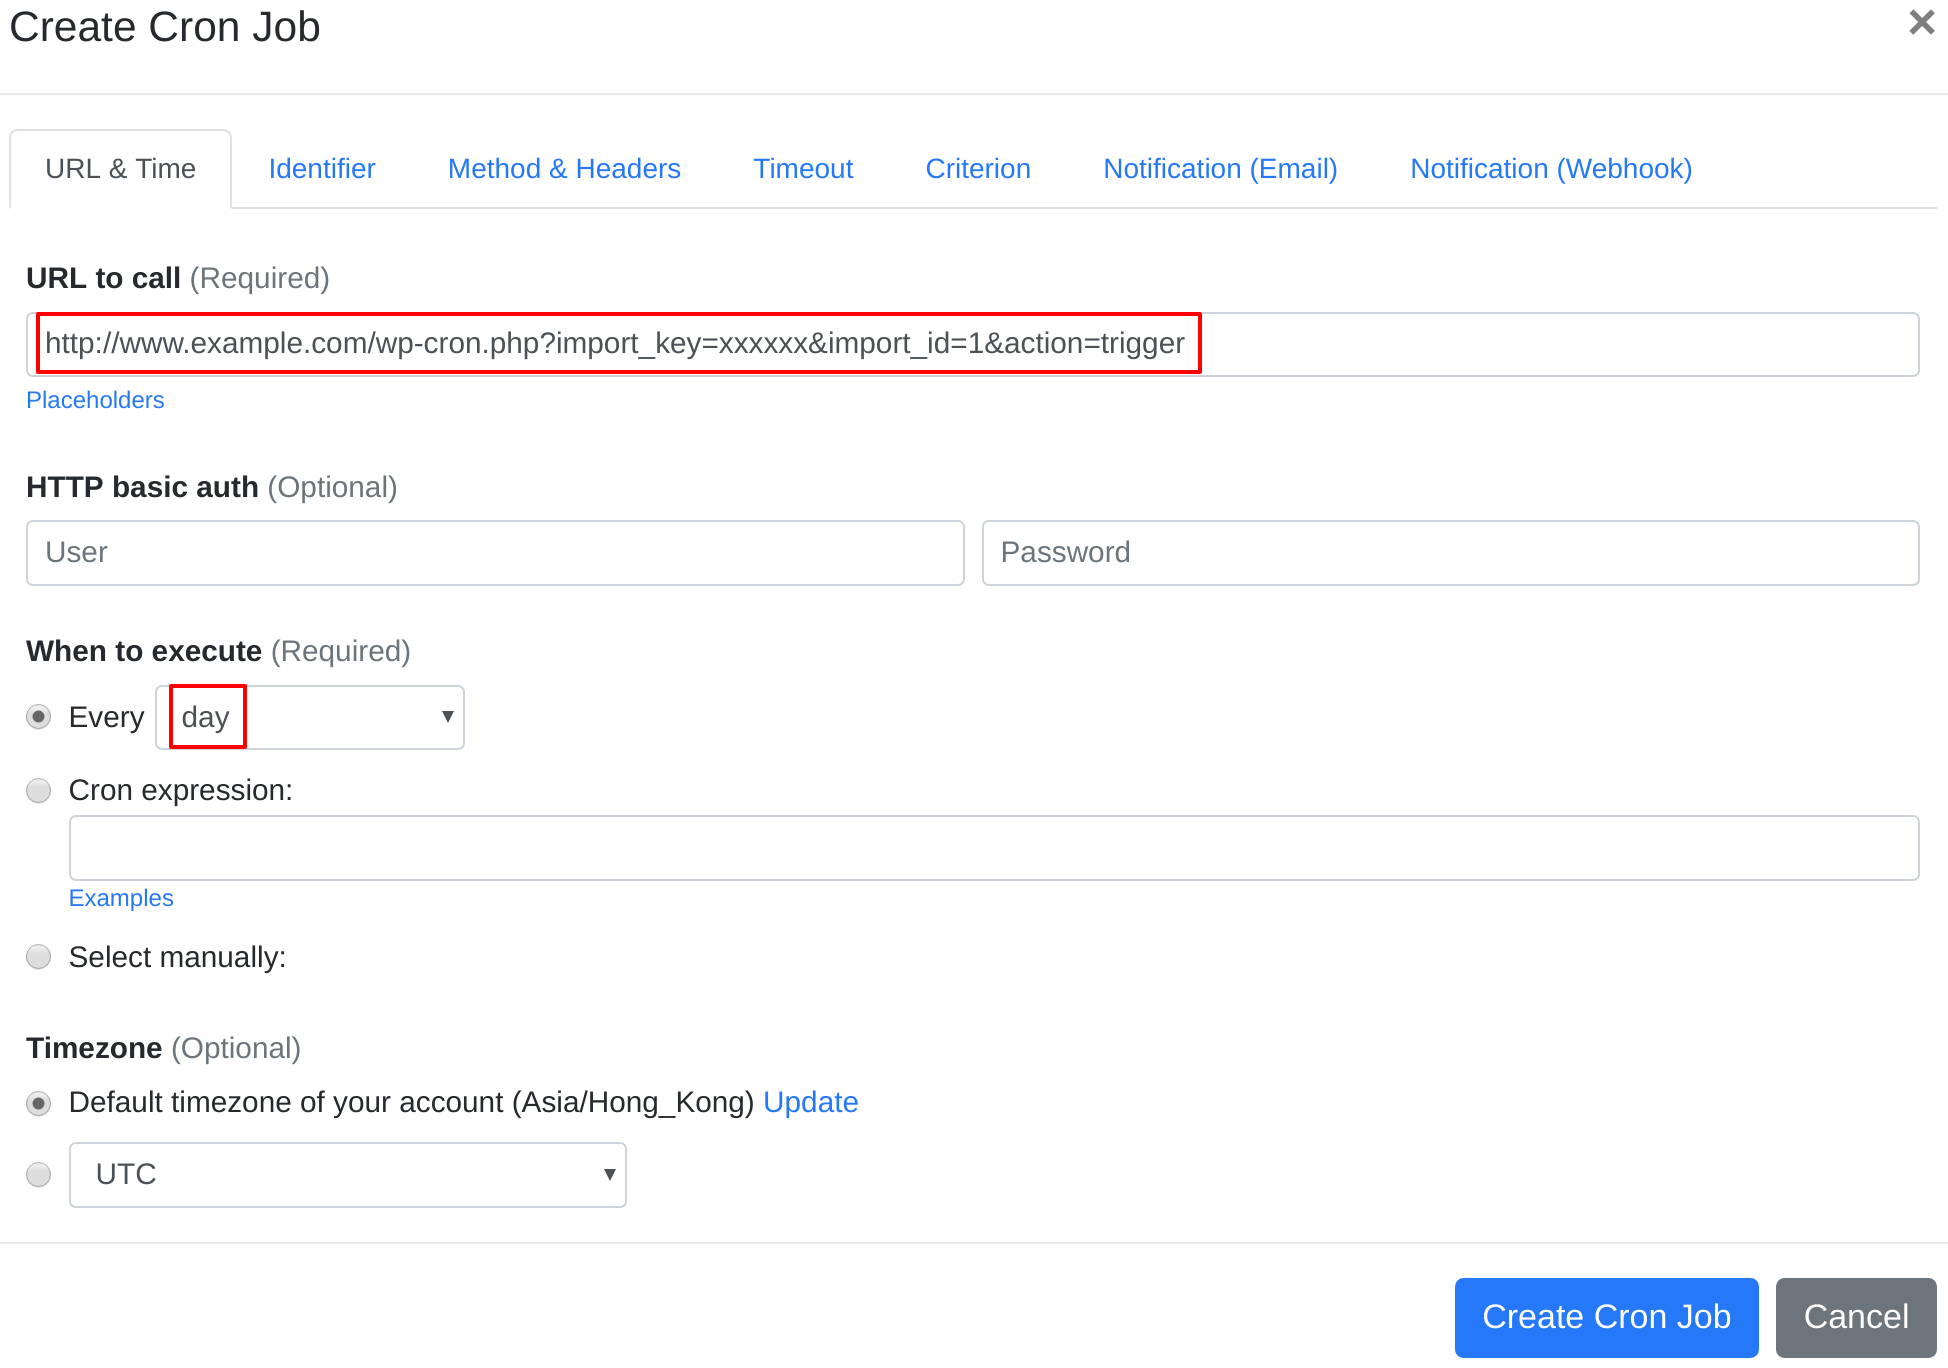
Set up cron job for WP All Import - Import any XML or CSV File to WordPress - Click "Create Cron Job" button.
- Click "Create New Cron Job" button for creating the other cron job.
- In field "URL to call", enter the processing URL: http://www.example.com/wp-cron.php?import_key=xxxxxx&import_id=1&action=processing (replace www.example.com with your install location; import_key with Secret Key above; and import_id with Import ID above). Choose an appropriate cron job execution frequency (for WP All Import - Import any XML or CSV File to WordPress, we recommend to have the cron job run "every 2 minutes"). Checkout below screenshot:

Set up cron job for WP All Import - Import any XML or CSV File to WordPress - If necessary, finish the other optional settings.
- Click "Create Cron Job" button. You're done! EasyCron will trigger your WP All Import - Import any XML or CSV File to WordPress' cron job script dutifully according to your time setting.
- In order to make sure you always fire a "trigger" cron job before running any "processing" cron job, you should run the "trigger" cron job manually for one time.
- If you haven't registered your EasyCron account yet, click on the "add a password" link on the top to add an email and password to your account.
Useful information about cron jobs in WP All Import - Import any XML or CSV File to WordPress
If you're experiencing any cron job execution error, you may need to adjust the amount of records to import in each processing cron job as described at here.
Some sample expected responses of your cron jobs are:
- When a "trigger" cron job is done (a new importing task is triggered and initialized), the response will be:
{"status":200,"message":"#*** Cron job triggered."} - When a "processing" cron job finishes importing a chunk of data (that is, part of the whole importing task is done), the response will be:
{"status":200,"message":"Records Processed xxx. Records imported yyy of zzz."} - When a triggered importing task is completely finished by the "processing" cron job, the response will be:
{"status":200,"message":"Import #*** complete"} - After the previous triggered importing task is finished and the next importing task is not yet triggered, any "processing" cron job will generate response:
{"status":403,"message":"Import #*** is not triggered. Request skipped."}