Question:
I installed WP Fan Machine on my server, and I want to set up a cron job to trigger WP Fan Machine's cron job script. What should I do to set up the cron job?
Answer:
Our webcron service is best for triggering WP Fan Machine's cron job script. Just follow below simple steps to configure cron job for your WP Fan Machine:
- Open your cron job dashboard, click on " Cron Job" button.
- For WP Fan Machine
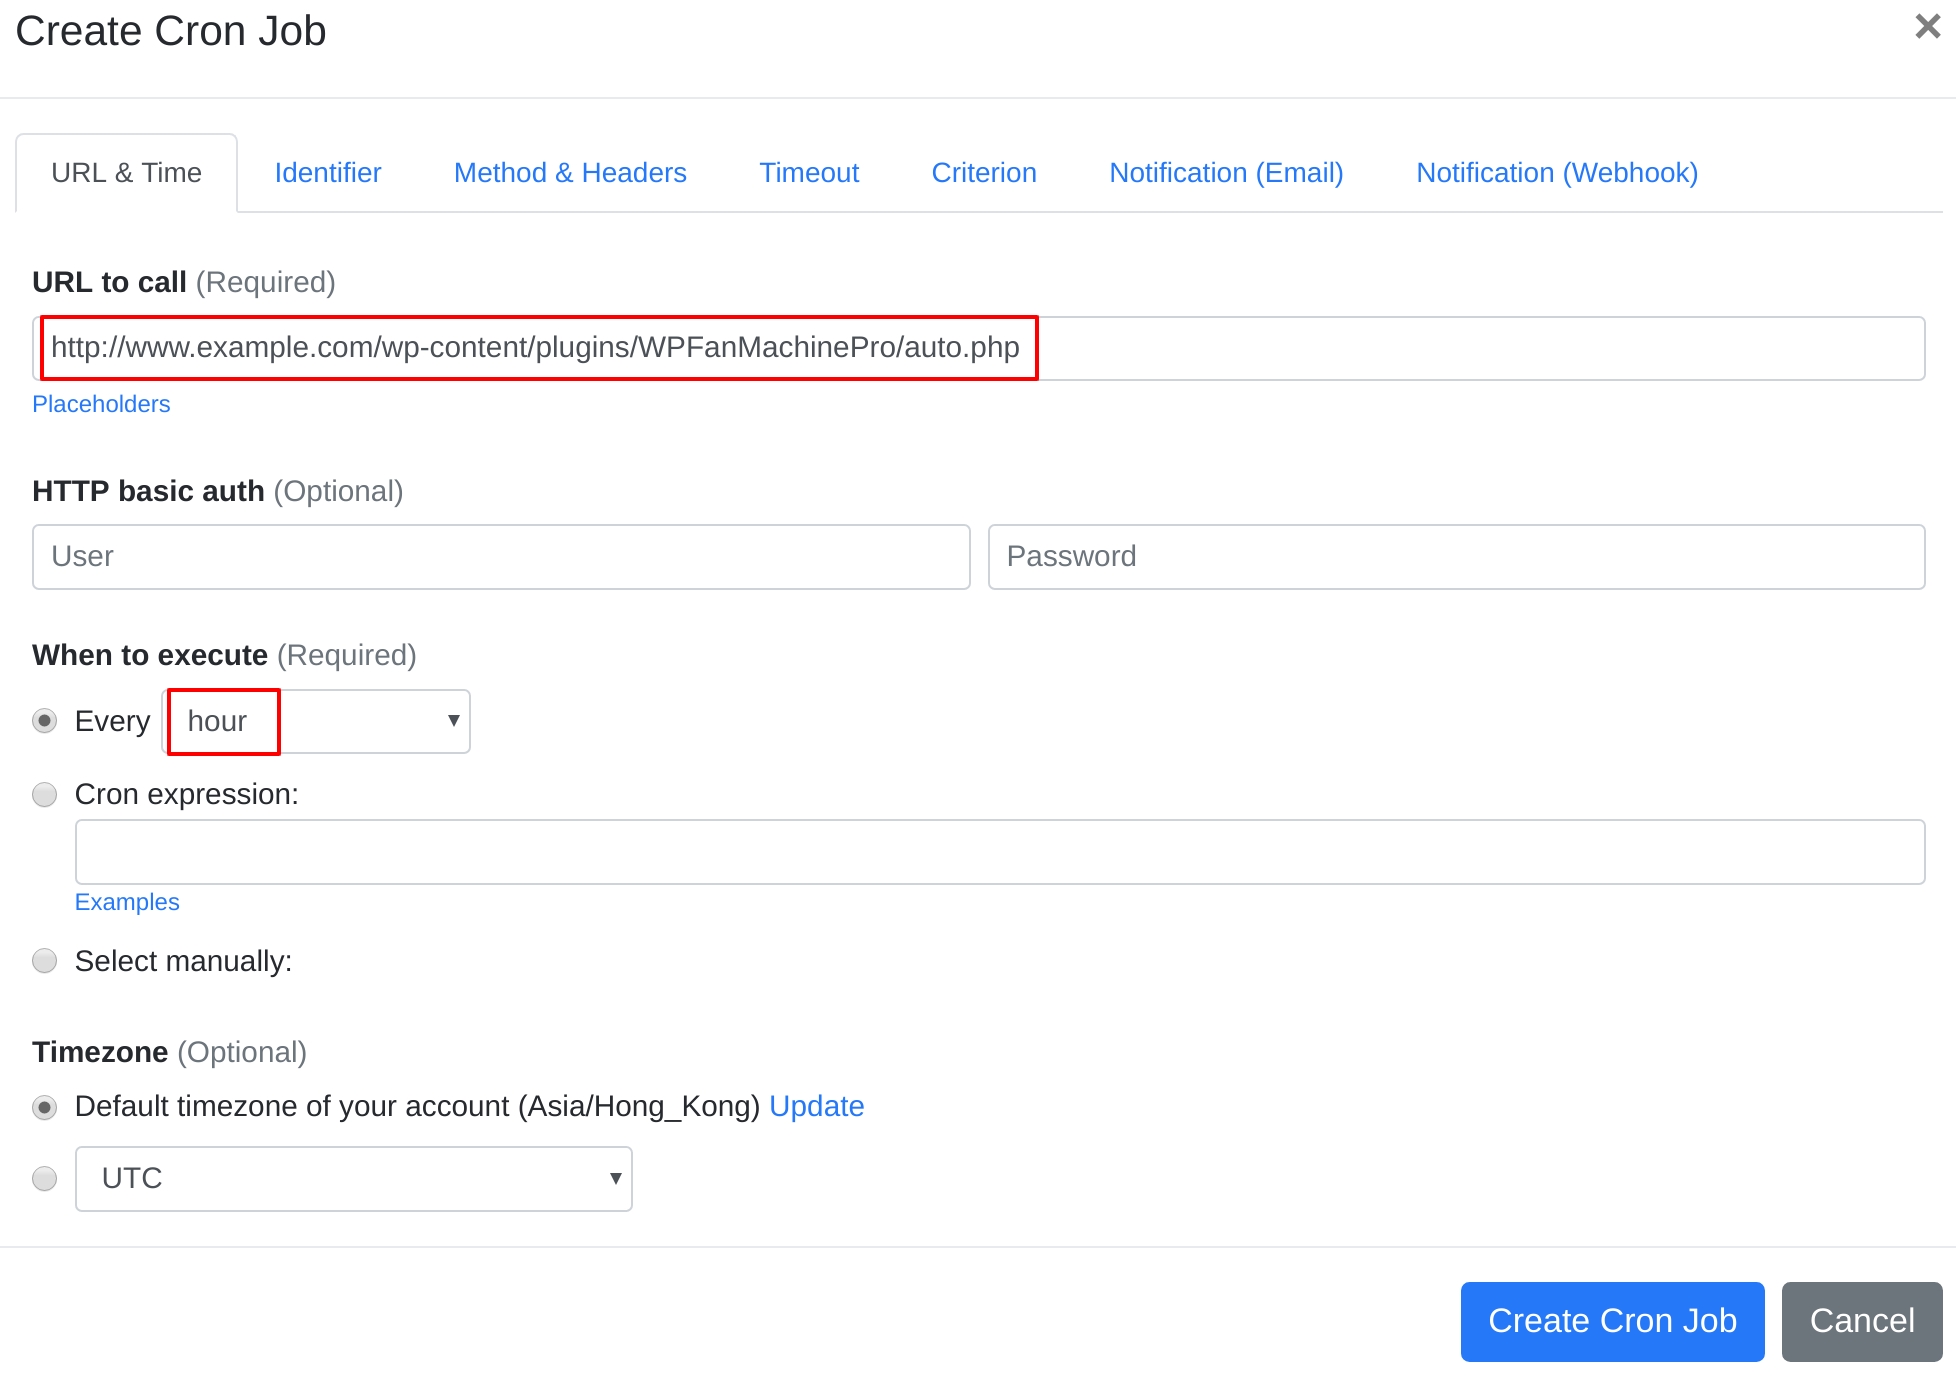
In field "URL to call", enter following URLs respectively for each cron job: http://www.example.com/wp-content/plugins/WPFanMachinePro/auto.php http://www.example.com/wp-content/plugins/WPFanMachineBasic/auto.php
(replace www.example.com path with your install location). Choose an appropriate cron job execution frequency. Checkout below screenshot:
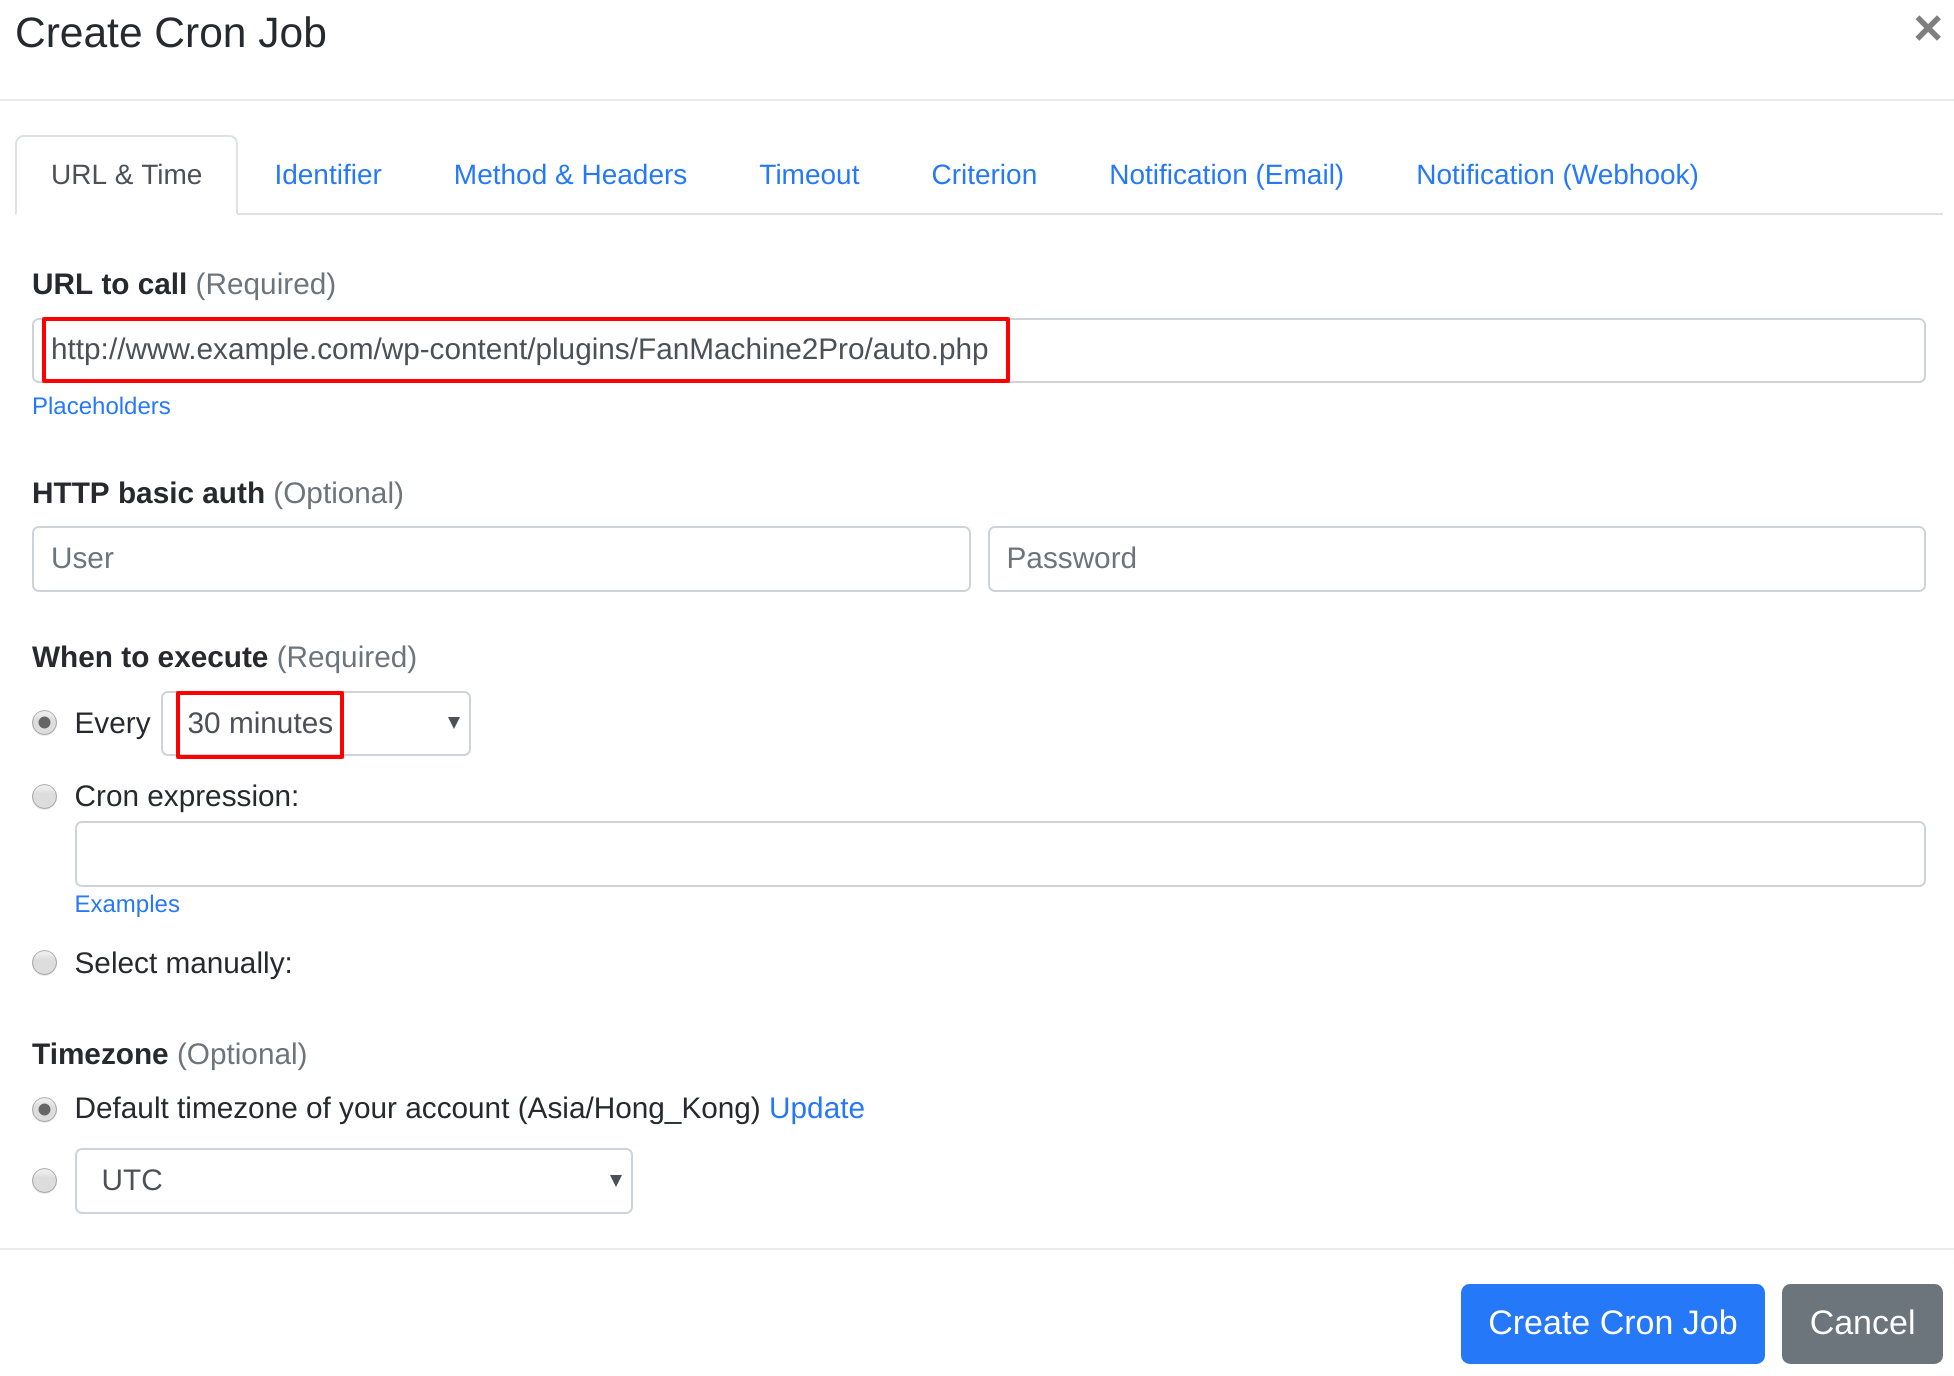
Set up cron job for WP Fan Machine - For WP Fan Machine 2.0
In field "URL to call", enter following URLs respectively for each cron job: http://www.example.com/wp-content/plugins/FanMachine2Pro/auto.phphttp://www.example.com/wp-content/plugins/FanMachine2Pro/auto2.php
http://www.example.com/wp-content/plugins/FanMachine2Pro/auto3.php
http://www.example.com/wp-content/plugins/FanMachine2Pro/auto4.php
(replace www.example.com path with your install location). Choose an appropriate cron job execution frequency. Checkout below screenshot:
Set up cron job for WP Fan Machine - If necessary, finish the other optional settings.
- Click "Create Cron Job" button. You're done! EasyCron will trigger your WP Fan Machine's cron job script dutifully according to your time setting.
- If you haven't registered your EasyCron account yet, click on the "add a password" link on the top to add an email and password to your account.